
 русский
 简体中文
简体中文

Installing a valve in a buried pipeline involves more than placing a valve between two pipe sections. Once the pipeline is covered, access becomes limited, so the position, connection, and surrounding conditions need to be considered before soil is returned to the trench. A small alignment problem during installation can become harder to deal with after the pipe is buried.
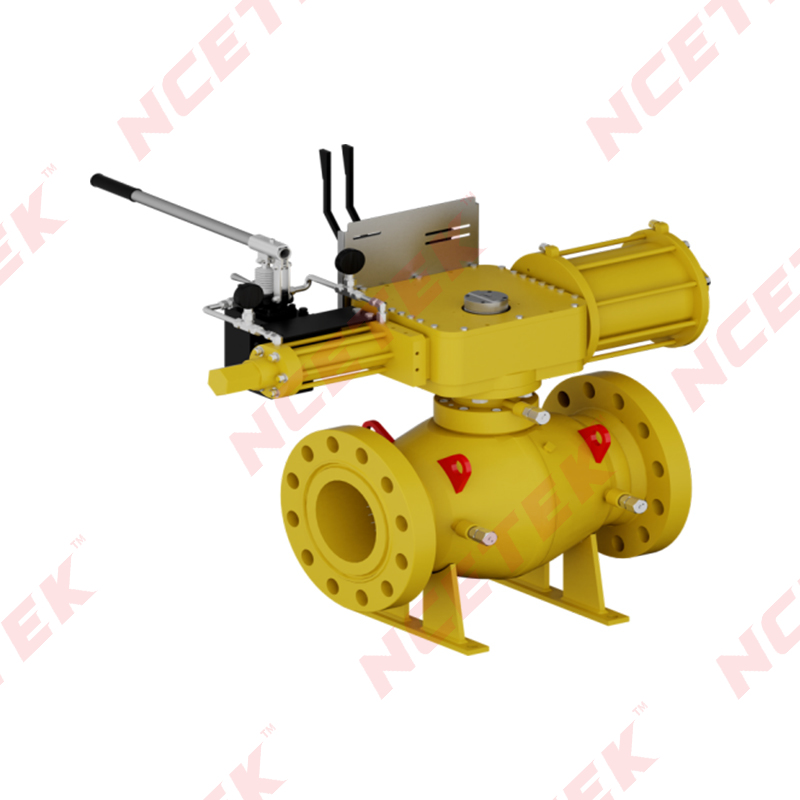
A Full Welded Ball Valve is connected directly to the pipeline, which makes the relationship between the valve body and pipe especially important during installation. Both sides need to remain properly positioned while the connection is completed. Excessive movement, uneven support, or unnecessary pressure around the joint can affect the condition of the assembled line.
Location also matters from an operating point of view. Although much of the valve may remain underground, an accessible operating part still needs suitable space. Nearby structures, bends, supports, or other pipeline components should not prevent normal opening and closing.
Several basic points deserve attention before installation begins:
A buried installation should therefore be treated as part of the complete pipeline layout rather than as an isolated connection task. Proper preparation makes later stages easier and reduces the chance of correcting problems after backfilling.
Preparation starts with a simple inspection of both the valve and pipeline. Pipe ends should be clean, stable, and ready for connection. Dirt, moisture, loose material, or surface damage around a joining area can interfere with the work and make accurate positioning more difficult.
The valve itself should also be checked before entering the trench. Connection areas need to remain free from damage, while moving parts should operate without unusual resistance. A visual inspection can reveal scratches, dents, contamination, or other conditions that may need attention before installation.
Pipeline direction should be confirmed at the same stage. A valve placed in an unsuitable position may still appear properly connected from a short distance, while its operating direction or relationship with nearby pipe sections becomes inconvenient later.
Support is another consideration. Pipe sections should not hang from the valve during positioning. Weight from a long section of pipe can place unwanted force on the connection area, making alignment harder and creating movement during welding.
A useful pre‑installation check can follow a simple order:
Such preparation does not require complicated procedures. Careful observation at the beginning can prevent several avoidable problems during connection.
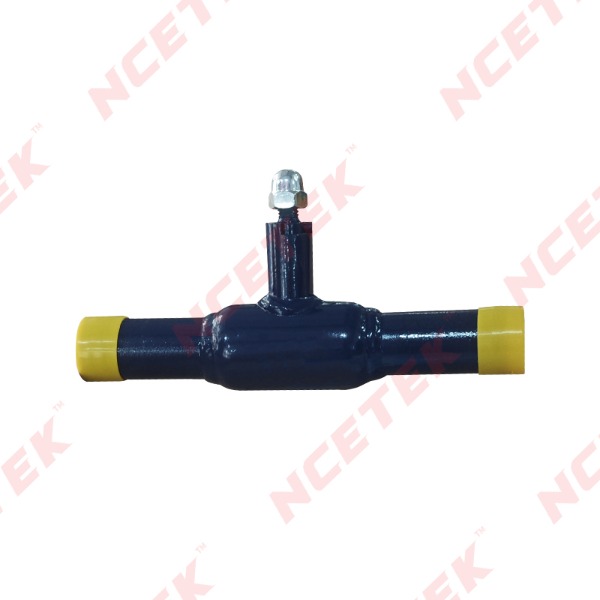
Pipe preparation creates the physical conditions needed for an accurate connection. Joining surfaces should be clean and reasonably even, while the two pipe ends need to sit in a position that allows the valve to be placed without forcing either side into an unnatural position.
Alignment starts before welding. Moving one pipe section sideways simply to make it meet the valve can place stress on the assembly. A better approach is to adjust the pipe position itself and allow both ends to approach the valve in a controlled manner.
The area around each pipe end also needs enough working space. Crowded trenches can make inspection and welding difficult, especially when nearby structures restrict movement. Space should allow the connection area to be observed during the work rather than leaving important parts hidden from view.
Surface condition deserves attention as well. Dirt or loose material around a joining area may affect the connection, while moisture can make the work harder to control. Cleaning should therefore be completed before final positioning.
Pipe preparation can be viewed through four simple conditions:
| Preparation Area | What to Check | Purpose |
|---|---|---|
| Pipe End | Clean and reasonably even | Supports proper contact |
| Position | Both sides aligned | Reduces unwanted force |
| Surrounding Space | Enough room for installation | Makes connection work easier |
| Pipe Support | Stable during positioning | Limits movement |
Once pipe ends are prepared, the valve can be brought into position without relying on force to correct differences between the two sides.
Alignment determines how naturally the valve fits into the pipeline. Both pipe ends should approach the valve along the intended pipeline direction, allowing the connection areas to meet without twisting or pulling the pipe into place.
For a Full Welded Ball Valve, alignment deserves particular care because the completed connection becomes part of the continuous pipeline. A valve that sits at an unwanted angle can change the position of nearby components and may also make operation less convenient.
Orientation should be checked before welding starts. An operating handle or other moving part needs to face a usable direction, with enough room for movement after the trench has been filled. A position that seems acceptable during open‑trench work may become difficult to operate once surrounding soil or structures are in place.
Temporary support can help hold the valve and pipe in position. Support should keep the assembly stable without placing excessive pressure on the valve body or connection areas.
Several signs can indicate that alignment needs adjustment:
Correct alignment is not simply about making two ends touch. It is about creating a stable relationship between the valve and pipeline before permanent connection begins.
Once alignment has been checked, connection work can begin. A Full Welded Ball Valve is joined directly with the surrounding pipe, so stability during welding becomes an important part of installation.
Both sides should remain in their intended positions while the connection is being completed. Uncontrolled movement can change the relationship between the valve and pipe, creating an uneven connection. Temporary supports or suitable holding methods can help keep the assembly steady.
Welding should follow the requirements appropriate to the pipe and valve construction. Heat needs to be managed carefully around the valve, especially near areas containing moving or sealing parts. Excessive heat or poorly controlled work can affect components that are not intended to receive direct heat.
The connection should also develop gradually rather than relying on force to close a gap between misaligned parts. A gap caused by incorrect positioning is better addressed through alignment before welding starts.
After joining, attention should remain on the connection area. A continuous connection with a stable shape provides a better basis for the checks that follow. A Buried Ball Valve will eventually be surrounded by soil, so visible inspection before backfilling has particular practical value.
Installation at this stage can be kept orderly by following a simple sequence:
A buried pipeline leaves less room for correction after installation, making careful positioning and connection work valuable long before the trench is closed.
Welding marks the end of the joining process, yet the installation work is not ready for backfilling at once. A visual check around the connection can reveal conditions that were not obvious during positioning. Attention should remain on the joint, nearby pipe surfaces, and the valve body.
A sound connection should have a consistent appearance without obvious cracks, gaps, or areas that look incomplete. The surrounding pipe should also remain in the intended position. Welding work can sometimes cause slight movement, so checking alignment again provides useful confirmation before the trench is closed.
Valve operation deserves another check at this stage. Moving the operating part can show whether surrounding components have shifted into an inconvenient position. Any unusual resistance should be investigated before soil covers the installation.
The inspection can follow a simple order:
A Full Welded Ball Valve becomes much harder to inspect once buried. Open access before backfilling provides a practical opportunity to correct visible installation issues without disturbing the surrounding soil later.
Backfilling should begin only after the installed assembly has been checked and the surrounding area is reasonably clear. Loose tools, pieces of material, and other construction waste should not remain around the valve because such objects can move during filling and place unwanted pressure on the assembly.
Protection also involves maintaining enough space around parts that need to remain accessible. A buried valve may have an operating component extending toward an access area, so surrounding soil should not block or press against that part.
Care is also needed when placing filling material close to the pipeline. Large or hard pieces can strike the valve or connection area during handling. Material should be placed in a controlled manner rather than dropped directly onto the installed equipment.
Pipeline support deserves attention during the same stage. Filling around one side only can create an uneven condition and may cause movement before the surrounding material has settled into place. Balanced placement helps keep the pipeline in its intended position.
Before backfilling, several conditions should be confirmed:
A Buried Ball Valve depends on the surrounding pipeline environment after installation, so protection does not end when welding is finished. Backfilling forms part of the installation process and needs to be handled with the same attention given to connection work.
Soil placed around a buried pipeline gradually becomes part of the environment supporting the pipe. During the filling process, pressure can be uneven when material is added too quickly or concentrated in one location. Such conditions may shift a pipe section or place stress near a connection.
For a valve installed between two pipe sections, stability matters on both sides. Backfill should support the surrounding pipeline without pushing the valve out of position. Careful placement near the connection area can reduce unnecessary movement during the early stage of filling.
The type and condition of filling material also influence how easily the area can be formed around the pipeline. Large pieces should not be allowed to fall directly against the valve. Loose material can also collect around operating parts and create problems for later access.
A practical approach is to work outward from the installed pipeline, keeping the connection area protected while surrounding material is gradually added. Attention can then shift toward restoring the trench once the valve and pipe have sufficient surrounding support.
Backfilling should therefore maintain three basic conditions:
Care during backfilling helps preserve the alignment established during installation. A carefully connected valve can still experience problems when surrounding soil is handled without regard to the pipeline structure.
Many installation problems begin with simple positioning issues rather than with the valve itself. A pipe that does not naturally align with the valve may be pulled into position during connection, creating unwanted force across the assembly.
Another concern appears during welding. Heat and movement need to remain under control so that nearby valve parts are not exposed to unnecessary effects. Connection work should follow the requirements suited to the actual materials and construction.
Support problems can also appear when long pipe sections are left without adequate temporary support. Weight from either side may influence the valve position before or during welding.
Backfilling introduces another group of possible problems. Soil placed unevenly can shift the pipeline, while hard material dropped near the valve may cause physical damage. Blocking the operating area can create difficulties later even when the connection itself remains intact.
Common issues can be grouped into a few areas:
Alignment
Connection
Backfilling
Preventing such problems depends largely on keeping each stage connected to the previous one. Alignment needs to be correct before welding, inspection needs to be completed before filling, and the surrounding pipeline needs to remain stable as the trench is restored.
A practical installation process starts with the pipeline rather than with the valve alone. Pipe direction, connection position, surrounding space, and operating requirements provide the conditions for deciding where the valve should sit.
Once the position is established, pipe ends can be prepared and supported. Alignment should then be checked before any permanent joining work begins. Such an order keeps the connection task from becoming a way to correct earlier positioning problems.
After welding, inspection provides a separate checkpoint. Connection areas can be examined while they remain accessible, while valve operation and pipeline alignment can also be checked before soil covers the installation.
Backfilling comes later and should preserve the position already established. Controlled placement of surrounding material helps maintain support and reduces unnecessary pressure around the valve.
For a Full Welded Ball Valve, a clear installation sequence can be arranged as follows:
A Buried Ball Valve is ultimately part of a larger pipeline system, so installation needs to follow the movement, support, and operating requirements of that system. Starting from the pipe layout and moving through preparation, alignment, joining, inspection, and backfilling creates a more orderly installation path.
Careful work does not depend on complicated steps. Much of the process comes down to keeping the pipe properly positioned, maintaining clean joining areas, checking the completed connection, and protecting the assembly while the trench is filled. Such basic controls help keep the installed valve consistent with the original pipeline arrangement.
 nce@cnnsv.com
 +86-15727968392 / +86-15397375798
 +86-577-67091815
 +86-577-67091815
 Dongou Industrial Zone, Oubei Street, Yongjia County, Wenzhou City, Zhejiang Province, China


Contact Us